자바스크립트 기능 살펴보기
자바스크립트 기능 살펴보기
안녕하세요! 오늘은 자바스크립트 기능 중 마우스 이펙터를 만들어 보도록 하겠습니다.
먼저 기능들을 살펴보자면 마우스 포인터를 따라 다니게 만들 것이며, 특정 단어에 마우스를 hover하게 되면 애니메이션 효과를 주도록 하겠습니다.
1
2
3
4
5
6
7
8
9
10
11
12
13
14
15
16
17
18
19
20
21
22
23
24
25
26
27
28
29
30
31
32
33
34
35
36
37
38
39
40
41
42
43
44
45
46
47
48
49
50
51
52
53
54
55
<body>
    <div id="wrap">
        <header id="header">
            <div class="header__inner">
                <h1>Mouse Effect <em>01</em></h1>
            </div>
        </header>
        <!-- //header -->
        <main id="main">
            <div class="cursor"></div>
            <div class="main__inner">
                <p>
                    <span>JavaScript</span> is a programming <span>language</span> used to make web pages interactive.
                    It runs
                    directly in
                    web
                    browsers, allowing for user interactions and dynamic data updates.

                    Versatile Scripting Language: JavaScript is one of the three core technologies of the web, governing
                    the behavior of web pages alongside HTML and CSS.
                    Client-Side Execution: Most JavaScript code runs on the user's computer, enhancing page
                    responsiveness and speed
                    Event-Based Programming: JavaScript responds to user <span>interactions</span> like clicks and
                    scrolls to execute
                    functions.
                    <span>DOM Manipulation</span>: JavaScript can dynamically change the structure of HTML documents
                    through the
                    Document Object Model (DOM).
                </p>
            </div>
            <div class="main__info">
                <ul>
                    <li>clientX <span class="clientX">0</span></li>
                    <li>offsetX <span class="offsetX">0</span></li>
                    <li>pageX <span class="pageX">0</span></li>
                    <li>screenX <span class="screenX">0</span></li>
                </ul>
            </div>
        </main>
        <!-- //main -->
        <footer id="footer">
            <div class="footer__inner">
                <nav>
                    <ul>
                        <li class="active"><a href="mouse01.html">01</a></li>
                        <li><a href="mouse02.html">02</a></li>
                        <li><a href="mouse03.html">03</a></li>
                        <li><a href="mouse04.html">04</a></li>
                    </ul>
                </nav>
            </div>
        </footer>
        <!-- //footer -->
    </div>
    <!-- //wrap -->
저는 html을 이런식으로 코딩 하였지만 보고 따라 하시는 분들은 자유롭게 스타일을 만드시면 됩니다.
코드를 살펴보면 ClientX, offsetX, pageX, screenX 가 보일것입니다.
해당 코드들은 마우스가 움직이는 X 좌표들을 나타내는 코드들입니다. 이제 CSS 쪽을 살펴보도록 하겠습니다.
1
2
3
4
5
6
7
8
9
10
11
12
13
14
15
16
17
18
19
20
21
22
23
24
25
26
27
28
29
30
31
32
33
34
35
36
37
38
39
40
41
42
43
44
45
46
47
48
49
50
51
52
53
54
55
56
57
58
59
60
61
62
63
64
65
66
67
68
69
70
71
72
73
74
75
76
77
78
79
80
81
82
83
84
85
86
87
88
89
90
91
92
93
94
95
96
97
98
99
100
101
102
103
104
105
106
107
108
109
110
111
112
113
114
115
116
117
118
119
120
121
122
123
124
125
126
127
128
129
130
131
132
133
134
135
136
137
138
139
140
141
142
143
144
145
146
147
148
149
150
151
152
153
154
155
156
157
158
159
160
161
162
163
164
165
166
167
168
169
170
171
172
173
174
175
   <style>
        body {
            cursor: none;
        }

        .main__inner {
            display: flex;
            align-items: center;
            justify-content: center;
        }

        .main__inner p {
            color: #BFEF9A;
            padding: 10vw;
            font-size: 1.8vw;
            text-align: center;
            font-family: "Catamaran", sans-serif;
            font-weight: 300;
        }

        .main__inner p em,
        span,
        i,
        strong {
            font-style: normal;
            font-family: "Catamaran";
            font-weight: 900;
        }

        .main__info {
            color: #BFEF9A;
            position: absolute;
            width: 100%;
            left: 16px;
            top: 60px;
            font-size: 14px;
        }

        .main__info ul {
            display: flex;
            flex-wrap: wrap;
        }

        .main__info ul li {
            width: 25%;
            text-transform: uppercase;
            font-family: 'Catamaran';
            color: #BFEF9A;
            font-weight: 200;
        }

        .cursor {
            width: 100px;
            height: 100px;
            background-color: #bfef9a78;
            border: 1px solid #bfef9a44;
            position: absolute;
            backdrop-filter: blur(5px);
            left: 10px;
            top: 10px;
            border-radius: 50%;
            z-index: 10000;
            user-select: none;
            pointer-events: none;
            transition: transform 0.5s,
                background-color 0.3s, border 0.3s, border-radius 0.3s;
        }

        .cursor.span1 {
            background-color: #ebe07943;
            border: 1px solid #e3d97f43;
        }

        .cursor.span1::before {
            background-color: #C24E00;
        }

        .cursor.span1::after {
            background-color: #C24E00;
        }

        .cursor.span2 {
            background-color: #15c92a43;
            border: 1px solid #0e9e1f;
            transform: scale(0.5);
        }

        .cursor.span2::before {
            background-color: #0e9e1f;
        }

        .cursor.span2::after {
            background-color: #0e9e1f;
        }

        .cursor.span3 {
            background-color: #e071106c;
            border: 1px solid #9e4a0e;
            border-radius: 1%;
            transform: rotate(720deg) scale(3);
        }

        .cursor.span3::before {
            background-color: #9e4a0e;
        }

        .cursor.span3::after {
            background-color: #9e4a0e;
        }

        .cursor.span4 {
            background: linear-gradient(135deg, rgba(74, 20, 213, 0.42) 0%, rgba(158, 74, 14, 0.8) 100%);
            border: 2px solid #9e4a0e;
            border-radius: 10px;
            /* 더 부드러운 모서리 효과 */
            box-shadow: 0 4px 8px rgba(0, 0, 0, 0.5);
            /* 그림자 효과 추가 */
            transform: rotateX(0deg) rotateY(0deg) rotateZ(0deg) scale(1);
            /* 초기 상태 */
            transition: transform 2s, background-color 2s, box-shadow 2s;
            /* 그림자 변화도 애니메이션 적용 */
            transform-style: preserve-3d;
            /* 3D 변형 스타일 유지 */

            transform: rotateX(360deg) rotateY(360deg) rotateZ(360deg) scale(1.5);
            /* 호버 시 3D 회전 및 확대 */
            background: linear-gradient(135deg, rgba(158, 74, 14, 0.8) 0%, rgba(74, 20, 213, 0.42) 100%);
            /* 그라데이션 방향 변경 */
            box-shadow: 0 10px 20px rgba(0, 0, 0, 0.75);
            /* 그림자 확대 */
        }

        .cursor.span4::before {
            background-color: #9e4a0e;
        }

        .cursor.span4::after {
            background-color: #9e4a0e;
        }

        .cursor::before {
            content: '';
            width: 20px;
            height: 1px;
            background-color: #bfef9a;
            position: absolute;
            left: 50%;
            top: 50%;
            transform: translate(-50%, -50%);
        }

        .cursor::after {
            content: '';
            width: 1px;
            height: 20px;
            background-color: #bfef9a;
            position: absolute;
            left: 50%;
            top: 50%;
            transform: translate(-50%, -50%);
        }

        .cursor.span {
            background-color: #41BFDC;
            border: 1px solid #28B8C8;
        }

        .cursor.span::after {
            background-color: #448C2C;
        }

        .cursor.span::before {
            background-color: #359B3D;
        }
    </style>
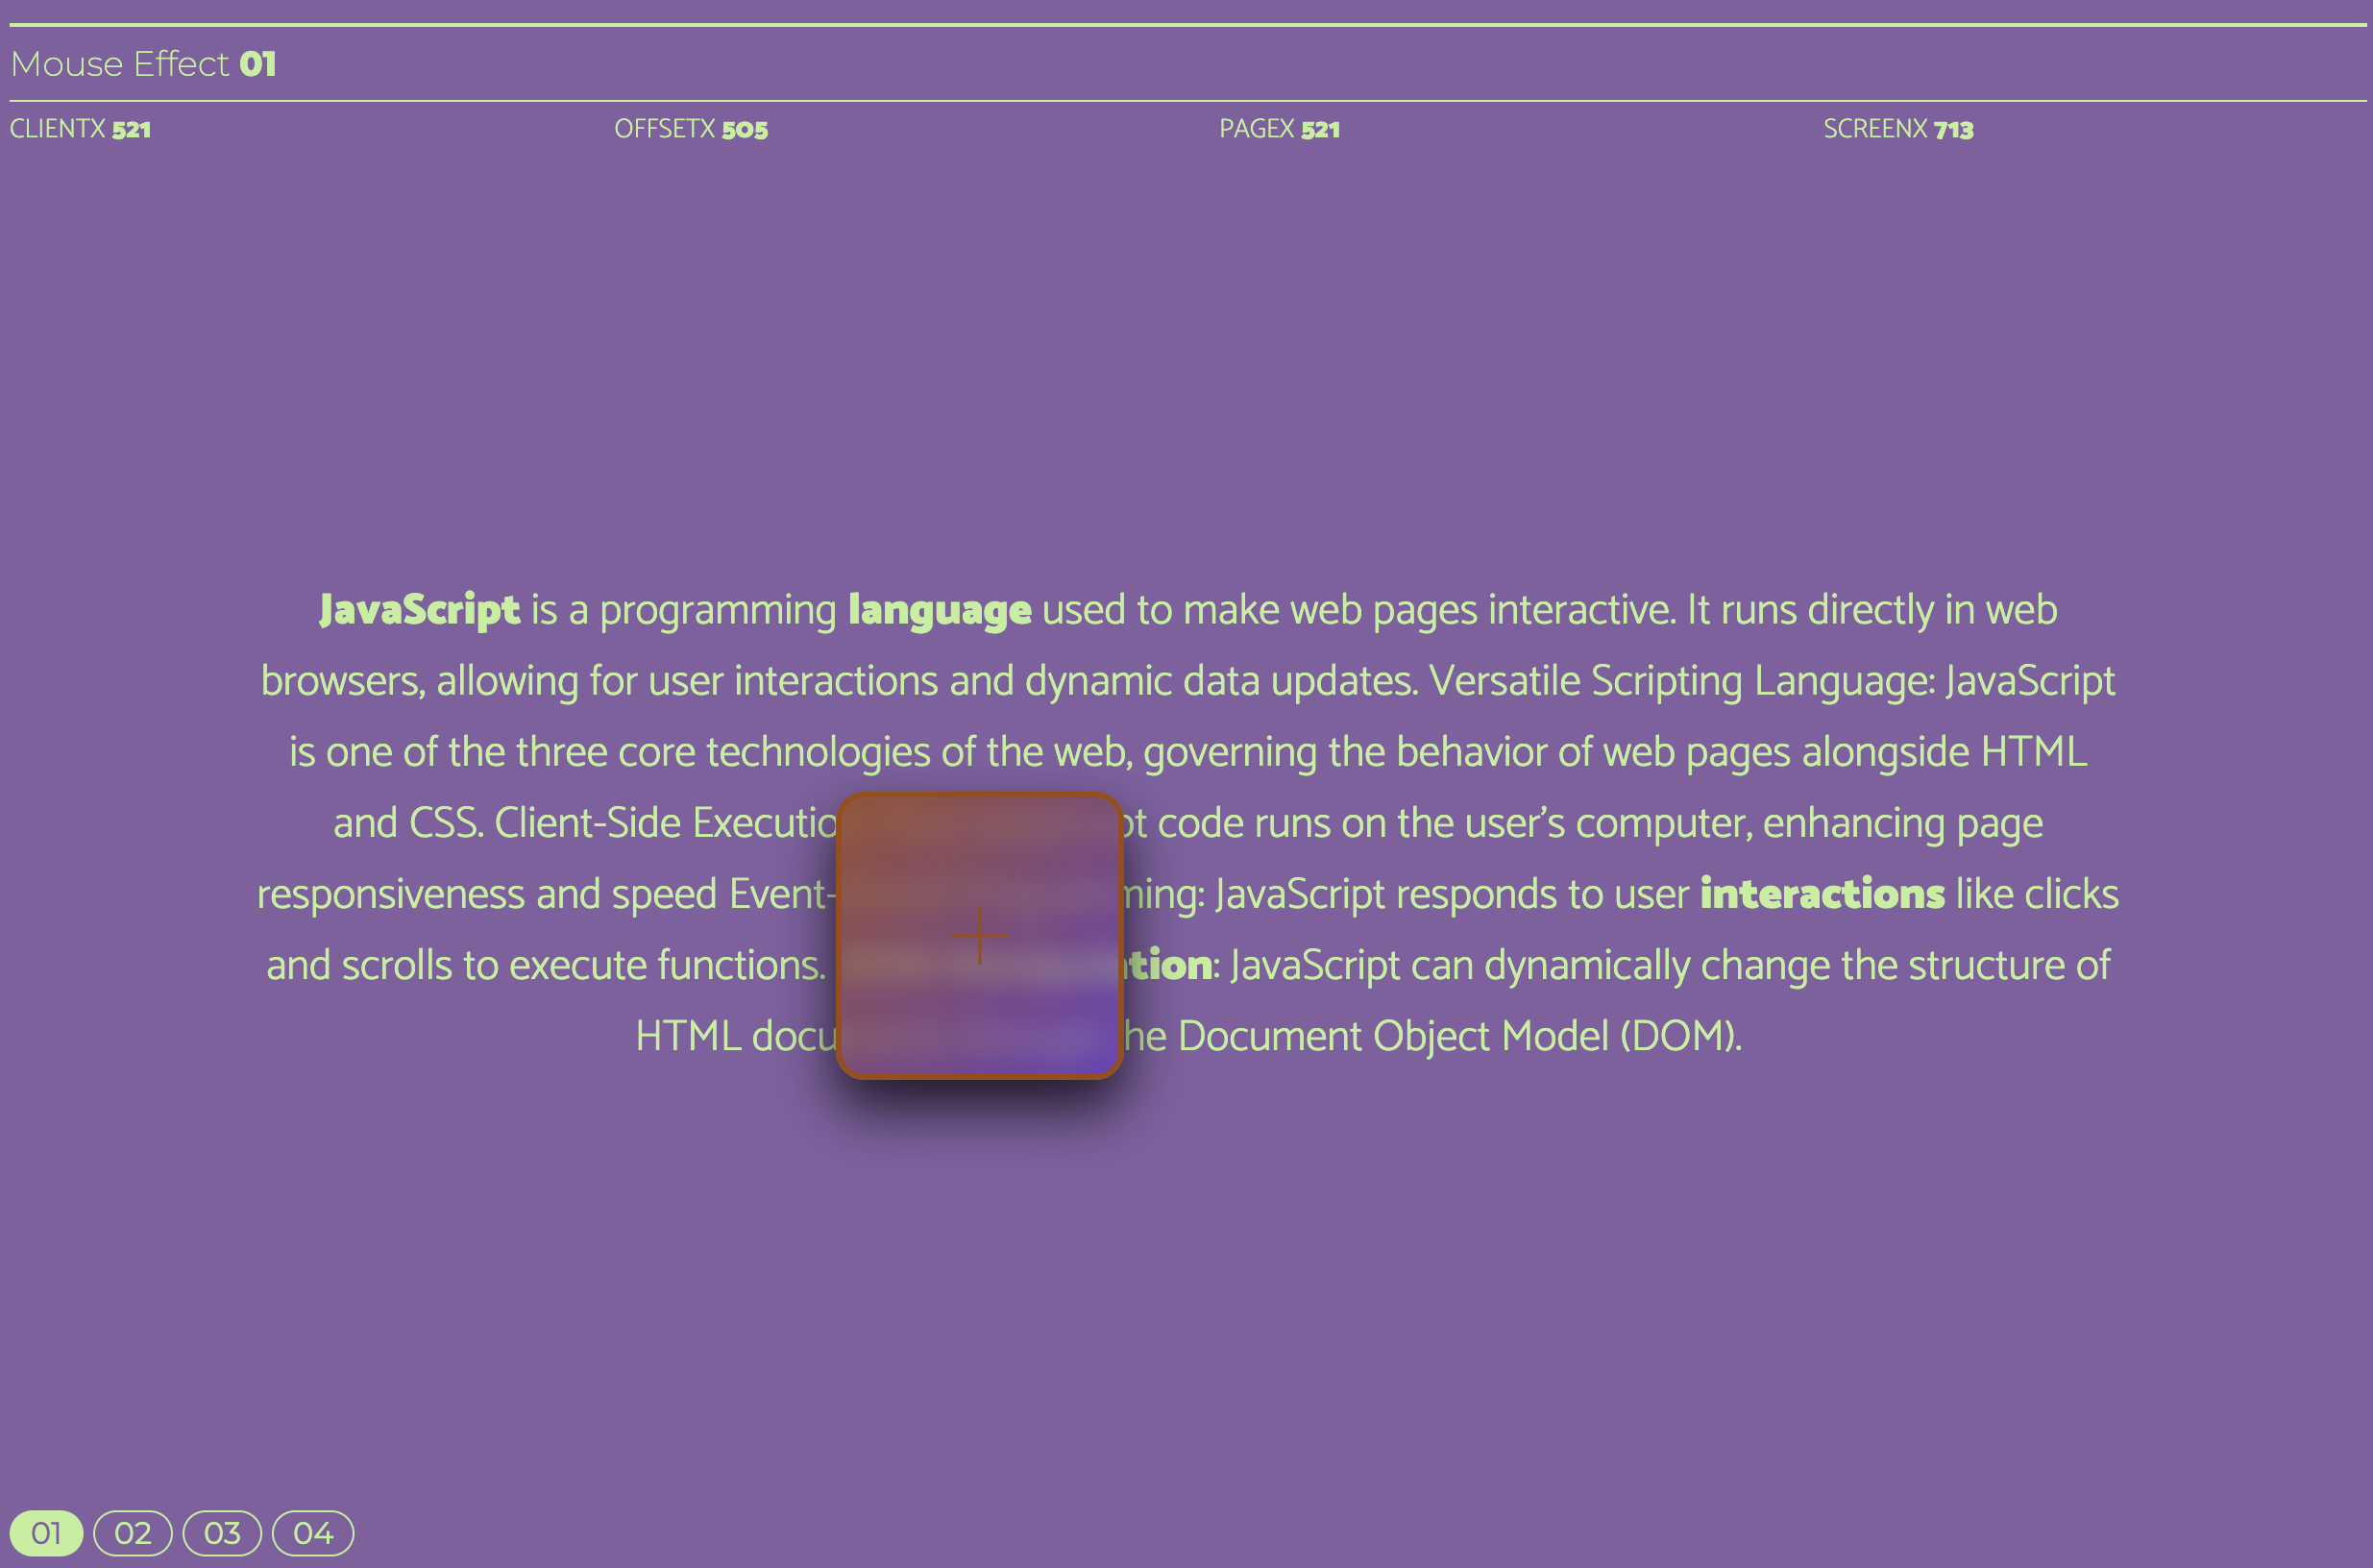
이런식으로 스타일을 짜게 되면
해당 사진 처럼 나오게 될 것입니다.
여기서 스크립트를 제외한 HTML,CSS로만 코딩을 한다면 해당 그림처럼 도형이 움직이지않고 한곳에서 멈춰있을 겁니다. 이제 이것에 script를 작성하여 움직이게 만들어 보겠습니다.
기본적으로 마우스가 커서를 따라 가게끔 스크립트를 짜도록 하겠습니다.
1
2
3
4
5
6
7
window.addEventListener("mousemove", function (event) {

    document.querySelector(".clientX").innerHTML = event.clientX;
    document.querySelector(".offsetX").innerHTML = event.offsetX;
    document.querySelector(".pageX").innerHTML = event.pageX;
    document.querySelector(".screenX").innerHTML = event.screenX;
});
해당 코드는 화면에 마우스를 움직일때 마다 좌표값을 보여주게 설정 한 것입니다. 아직은 마우스가 커서를 따라가지 않을 것입니다.
이제 마우스가 커서를 따라가게 스크립트를 짜도록 하겠습니다.
1
2
3
4
5
6
7
//mouse
const cursor = document.querySelector(".cursor");

window.addEventListener("mousemove", function (e) {
    cursor.style.left = e.clientX - 50 + "px"
    cursor.style.top = e.clientY - 50 + "px"
});
코드를 살펴보면 cursor란 변수를 설정 해주고 .cursor를 찾게 하였습니다. 그리고 window에서 이벤트를 추가 시켜 마우스가 움직일때마다 커서를 따라가게 설정을 해두었습니다. cursro.style.left 같은 경우 도형을 커서 정 중앙으로 오게 할려고 설정해두었습니다.
이번에는 문단에 마우스를 오버 하였을때 작동하는 스크립트를 구현 하도록 하겠습니다.
먼저 제일 원초적인 방식으로 보여드리도록 하겠습니다.
1
2
3
4
5
6
7
8
9
10
11
12
13
14
15
16
17
18
19
20
21
22
23
24
25
26
27
28

        document.querySelector(".main__inner p span:nth-child(1)").addEventListener("mouseover", function () {
            cursor.classList.add("span1");
        });
        document.querySelector(".main__inner p span:nth-child(1)").addEventListener("mouseout", function () {
            cursor.classList.remove("span1");
        });

        document.querySelector(".main__inner p span:nth-child(2)").addEventListener("mouseover", function () {
            cursor.classList.add("span2");
        });
        document.querySelector(".main__inner p span:nth-child(2)").addEventListener("mouseout", function () {
            cursor.classList.remove("span2");
        });

        document.querySelector(".main__inner p span:nth-child(3)").addEventListener("mouseover", function () {
            cursor.classList.add("span3");
        });
        document.querySelector(".main__inner p span:nth-child(3)").addEventListener("mouseout", function () {
            cursor.classList.remove("span3");
        });

        document.querySelector(".main__inner p span:nth-child(4)").addEventListener("mouseover", function () {
            cursor.classList.add("span4");
        });
        document.querySelector(".main__inner p span:nth-child(4)").addEventListener("mouseout", function () {
            cursor.classList.remove("span4");
        });
엄청난 노가다를 하게 한 코드입니다. 이렇게 하면 문단별로 기능들이 구현이 되지만 코드를 타이핑하는데 엄청 오래 걸릴 뿐더러 가독성도 떨어집니다. 그러면 어떻게 코딩을 하는게 좋을까요???
for문이나 혹은 foreach문을 사용하는게 좋습니다.
저는 foreach문을 사용하도록 하겠습니다.
1
2
3
4
5
6
7
8
  document.querySelectorAll(".main__inner p span").forEach((span, index) => {
            span.addEventListener("mouseover", function () {
                cursor.classList.add("span" + (index + 1));
            });
            span.addEventListener("mouseout", function () {
                cursor.classList.remove("span" + (index + 1));
            });
        });
해당 코드를 살펴보게 되시면 “.main__inner p span”을 찾고 거기에서 forEach 함수로 span에 마우스 오버 이벤트를 추가하는것과 동시에 cursor에 클래스인 span을 추가 하지만 span이 하나가아니기 떄문에 (index + 1)을 하게 된것입니다.
mouse를 땟었을때도 마찬가지로 코드를 작성하면 정상적으로 작동 될것입니다.
이렇게 오늘은 간단한 마우스 이펙터 효과를 공부하였는데 다음시간에는 더 괜찮은 주제로 찾아 뵙도록 하겠습니다.